With the dawn of iOS 18 (and iPadOS 18) , came the dawn of built in eye tracking!!! No more extra hardware or apps to operate the iPad with just your eyes. However, many people were disappointed with the accuracy of the eye tracking feature. I had the pleasure of attending a conference recently where an Apple Accessibility expert gave me some tips that dramatically improved the accuracy and ease of use of eye tracking. Not only that, but Apple continues to improve this technology, so if you haven’t tried it since it’s release, give it another chance. Here are practical tips to improve your eye tracking accuracy on iOS and iPadOS 18 devices.
1. Optimize Lighting Conditions
Eye tracking technology relies heavily on good lighting to function accurately. Here’s how you can optimize the lighting:
- Use a Light Background on Your Screen: Lighter backgrounds help the camera to better distinguish your eye movements. To change your background, go to
Settings > Wallpaper > Choose a New Wallpaperand select a light-colored wallpaper. - Increase the Brightness of Your Device: A brighter display helps the camera find your eyes. This helps in tracking precision. Adjust the brightness by swiping down from the top-right corner to access the Control Center and adjusting the brightness slider.
- Illuminate Your Face Evenly: If you’re using an app with a dark background, use a lamp or a selfie light directed towards your face. Do the same if you are in a dimly lit environment. This ensures that your facial features and eyes are visible and distinguishable by the camera.
2. Adjust your Eye Tracking Settings
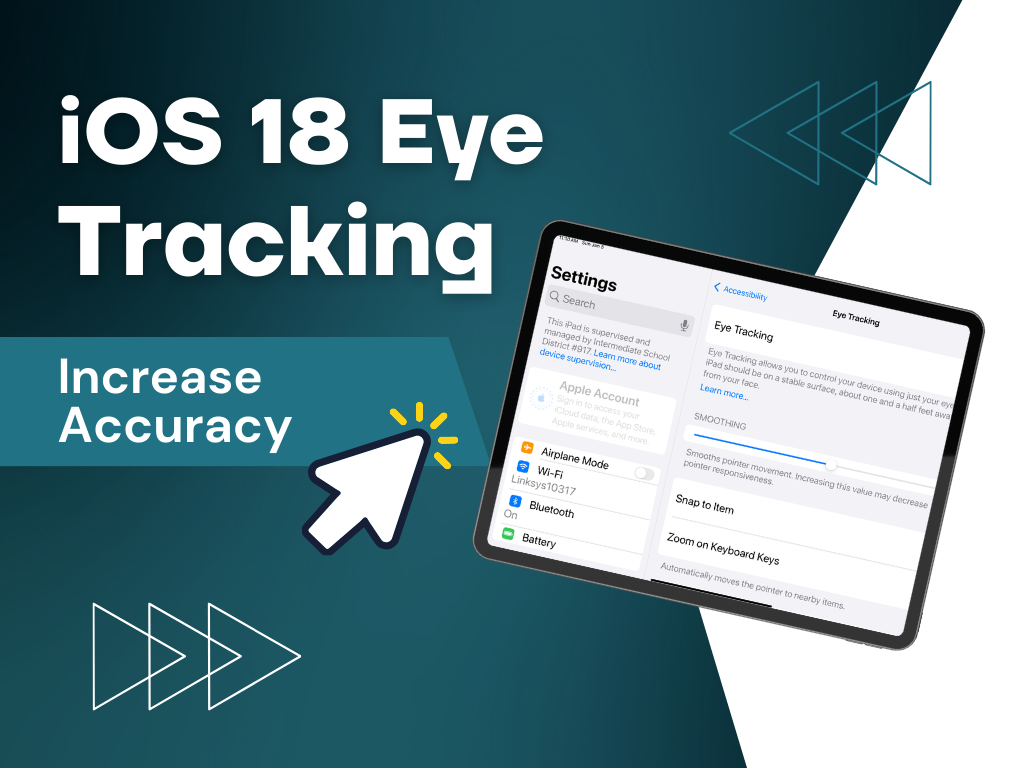
There are settings you should adjust on the same page where you turn Eye Tracking on. To turn eye tracking on go to Settings>Accessibility>Physical and Motor>Eye Tracking. When you turn Eye Tracking on, you will need to calibrate it for your eyes by following a dot around the screen.
- Turn Smoothing down – this will increase the pointer responsiveness.
- Turn on Snap to Item and Zoom on Keyboard Keys – this will help if accuracy is a little off
- Turn on Dwell Control – this is how you will select items- by gazing at them for a specific period of time(adjust dwell control settings in AssistiveTouch).
3. Configure Assistive Touch and Dwell Control
Assistive Touch is a powerful tool for users who have difficulty with physical buttons and gestures. It places a circle with access to gesture options on top of every screen that is navigated to so users can switch apps or press external buttons. It’s necessary to turn this on for eye gaze users. Here’s how to optimize it for eye tracking:
- Turn on Assistive Touch: Navigate to
Settings > Accessibility > Touch > Assistive Touchand toggle it on. - Customize the Menu: Add frequently used actions like the App Switcher and Home Button for easier access. In the Assistive Touch settings, go to
Customize Top Level Menu > +to add new icons. - Adjust Dwell Timing: Dwell time is the duration you need to gaze at a point on the screen to select it. Scroll to the bottom of the AssistiveTouch screen to adjust the dwell timing. You will need to experiment with this timing some, but 1.5 seconds is a good place to start.
4. Proper Positioning of Your Device
Correct positioning of your iPad or iPhone is crucial for accurate eye tracking. Follow these guidelines:
- Position at Eye Level: The device should be directly in line with your eyes about 1.5 feet away. Use an adjustable case or a mount to keep your device at eye level.
- Stable Positioning: Once your device is calibrated for eye tracking, avoid moving it or changing your seating position. If you have to move, recalibrate the device to maintain accuracy. You can recalibrate by turning Eye Tracking off and back on again.
By following these tips, you can significantly enhance the accuracy of eye tracking on your iOS or iPadOS 18 device, making your interaction more seamless and efficient. Remember, each user’s needs and environments are different, so it may take some adjustments to find the perfect setup for you.


Leave a Reply